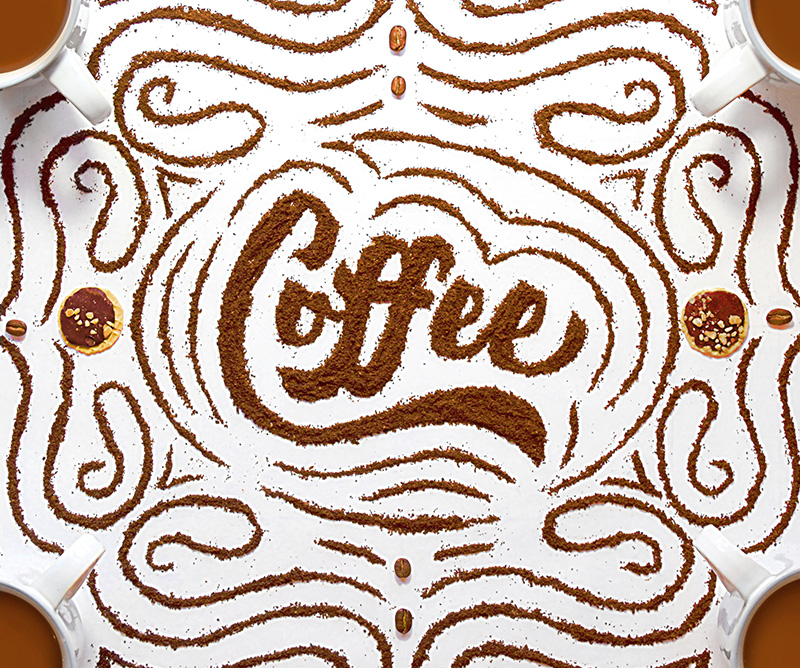
Coffee - Editorial Illustration
Custom lettering for a demo on how to create 3d lettering with found objects.
For one of my blog posts, I decided to show my what goes into creating a custom hand crafted lettering piece made from found objets. In this example, I decided to create a composition of coffee grounds, and photograph it for an editorial look.
Case Study
Below I have laid out the entire process that went into creating this piece of custom 3d lettering.
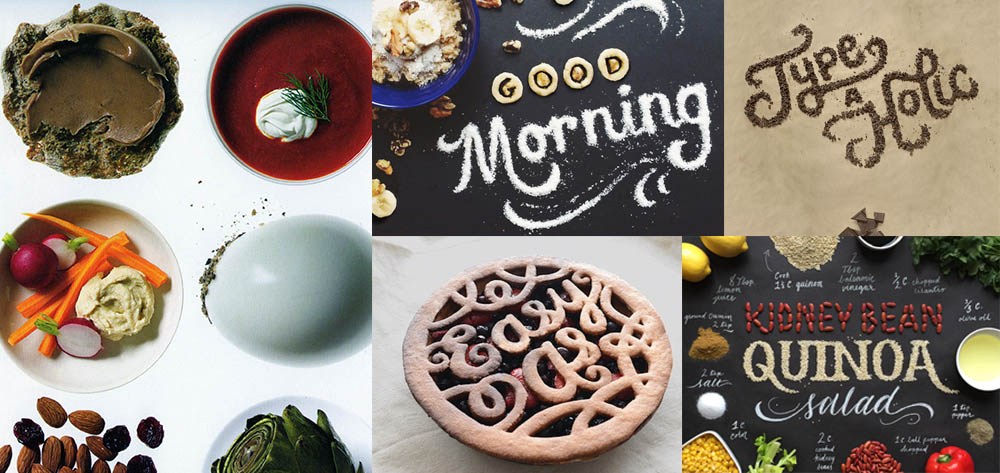
1. Concept / Moodboard
Going into this project, I had a clear vision of what I was trying to accomplish. Nevertheless, I gathered a few examples of the style of imagery I was going for, and examples of the type of content I was going for. Specifically, I wanted to use arial photography to get a professional and editorial aesthetic.
2. Initial Sketches
These are just about an inch in scale. Working small will prevent you from getting bogged down in details that you shouldn't be thinking about yet. The purpose is to try different approaches to your style.
I didn't spend an exhaustive amount of time experimenting with different styles, because I knew that I wanted to keep the lettering pretty simple and execute it as a bold script. At this early stage in the process, it is important to just have fun with your sketches, but I do recommend finding a reference image for the style you are trying to achieve. Having a clear idea of what you are trying to do will shine light on the ambiguity of the creative process.

I decided to base the lettering style off of a piece that I created a while back for practice.
3. Refine Sketches
The next step is refining a couple of the initial sketches at a larger scale. After refining both of these sketches, I decided to move forward with the sketch on the right, because I thought the letter "f"s were more legible, and I liked how the descenders hug the letter "o".


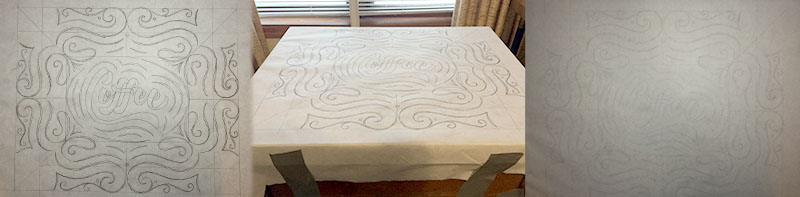
4. Plan for Composition
Now, with the lettering refined, I started to consider how I wanted to craft the composition around my lettering. I referred back to one of my initial sketches, and decided to house the lettering in an oval shape, and to create ornamentation within the oval by dividing the space around the word evenly within the shape.

Next, I decided to add to the composition outside of the oval, so I could incorporate coffee mugs into the composition. I quickly sketched out a kind of gestural representation of what I was going for. Now, similar to the way I refined the lettering from a thumbnail, I transferred the oval design to a large sheet of paper in order to work out the details of the new addition to the composition.

Above, you will see I added 4" on every side of the oval and divided it both horizontally and vertically. I then approached drawing the additional flourishes as a unit that would eventually be reflected to create a symmetrical boarder around the oval.

5. Adhere to Table
Now, with the additional flourishes reflected around the oval, I secured the final drawing to a coffee table to make sure it wouldn't move while I was working with the coffee.
6. Working with the Coffee Grounds
Below, I put together three animated gifs to demonstrate specific techniques I used while working with the coffee grounds.


